...works for everyone because you can easily adapt the intensity
Chair Fit …
… works for everyone because you can easily adapt the intensity— Taking it up a level or scaling it back to suit your group. It’s also much simpler to offer alternatives for those with knee, shoulder, or wrist issues. At its core, the goal of teaching is to help participants feel confident in their own bodies while improving strength, mobility, and balance.
Setting the stage
Before the class begins, establish a safe environment with these cues:
- “Check your chair.” Ensure your chair is sturdy, stable, and doesn’t have wheels. For more room, choose a chair without arms.
- “Clear your space.” Push back from any tables or furniture to allow for a full range of motion.
- “Plant your feet.” Place your chair on a non-slip surface, like a rug or yoga mat, to prevent it from sliding.
- “Listen to your body.” Remind participants to work at their own pace and never push into pain. They should stop or modify an exercise if they feel discomfort.
Posture and alignment
Cueing proper seated posture is essential for preventing strain and maximizing the benefits of the exercises.
- “Sit tall.” Encourage participants to sit upright and away from the back of the chair to engage their core.
- “Lengthen your spine.” Imagine a string pulling the crown of your head toward the ceiling.
- “Shoulders down and back.” Release tension by rolling your shoulders away from your ears.
- “Ground your feet.” Make sure your feet are flat on the floor with knees bent at a right angle.
- “Heels under your knees.” This helps ensure proper lower-body alignment and stability.
During movement
Provide precise, easy-to-follow cues to guide each exercise and reinforce safety.
- “Move slowly and with control.” Avoid quick, jerky, or bouncing movements that can cause strain.
- “Breathe with the movement.” Remind participants to inhale and exhale to relax joints and encourage a steady tempo.
- “Pull your belly button in” Prompt participants to gently tighten their abdominal muscles.
- “Only move as far as is comfortable.” This encourages people to respect their own range of motion, especially for stretches and twists.
- “Keep your hips still.” For seated twists, specify that the movement comes from the torso, not the hips, to protect the lower back, but add slight knee rotation if client has osteoporosis.
- “Push through your heels.” Use this for movements like sit-to-stands to activate the correct leg muscles and maintain stability.
- “Push through your heels.” Use this for movements like sit-to-stands to activate the correct leg muscles and maintain stability. Managing challenges and modifications
Offer variations and positive reinforcement to create an inclusive environment for different abilities. - “If you’d like more support…” Suggest holding the sides of the chair for balance during exercises like warrior poses, leg raises etc.
- “For less intensity…” Instruct participants to shorten their range of motion, such as combing the hair movement, stretching arms overhead etc.
- “It’s okay to start small.” Reassure beginners that it’s normal to have a limited range of motion at first and that consistent practice will build strength.
- “Great job, everyone.” Always add motivational cues to praise effort rather than performance.
Finalising the session
As you are coming to the end of the class you need to bring the heart rate down, so use gentle, slow movements for the cooldown. This is the perfect time to introduce any one of the following:
-
- Hand/Wrist exercises
- Feet mobilisers
- Neck and Shoulder stretches
- Breathing exercises…guiding participants through breathing exercises is a great way to end the class
Happy stretching!
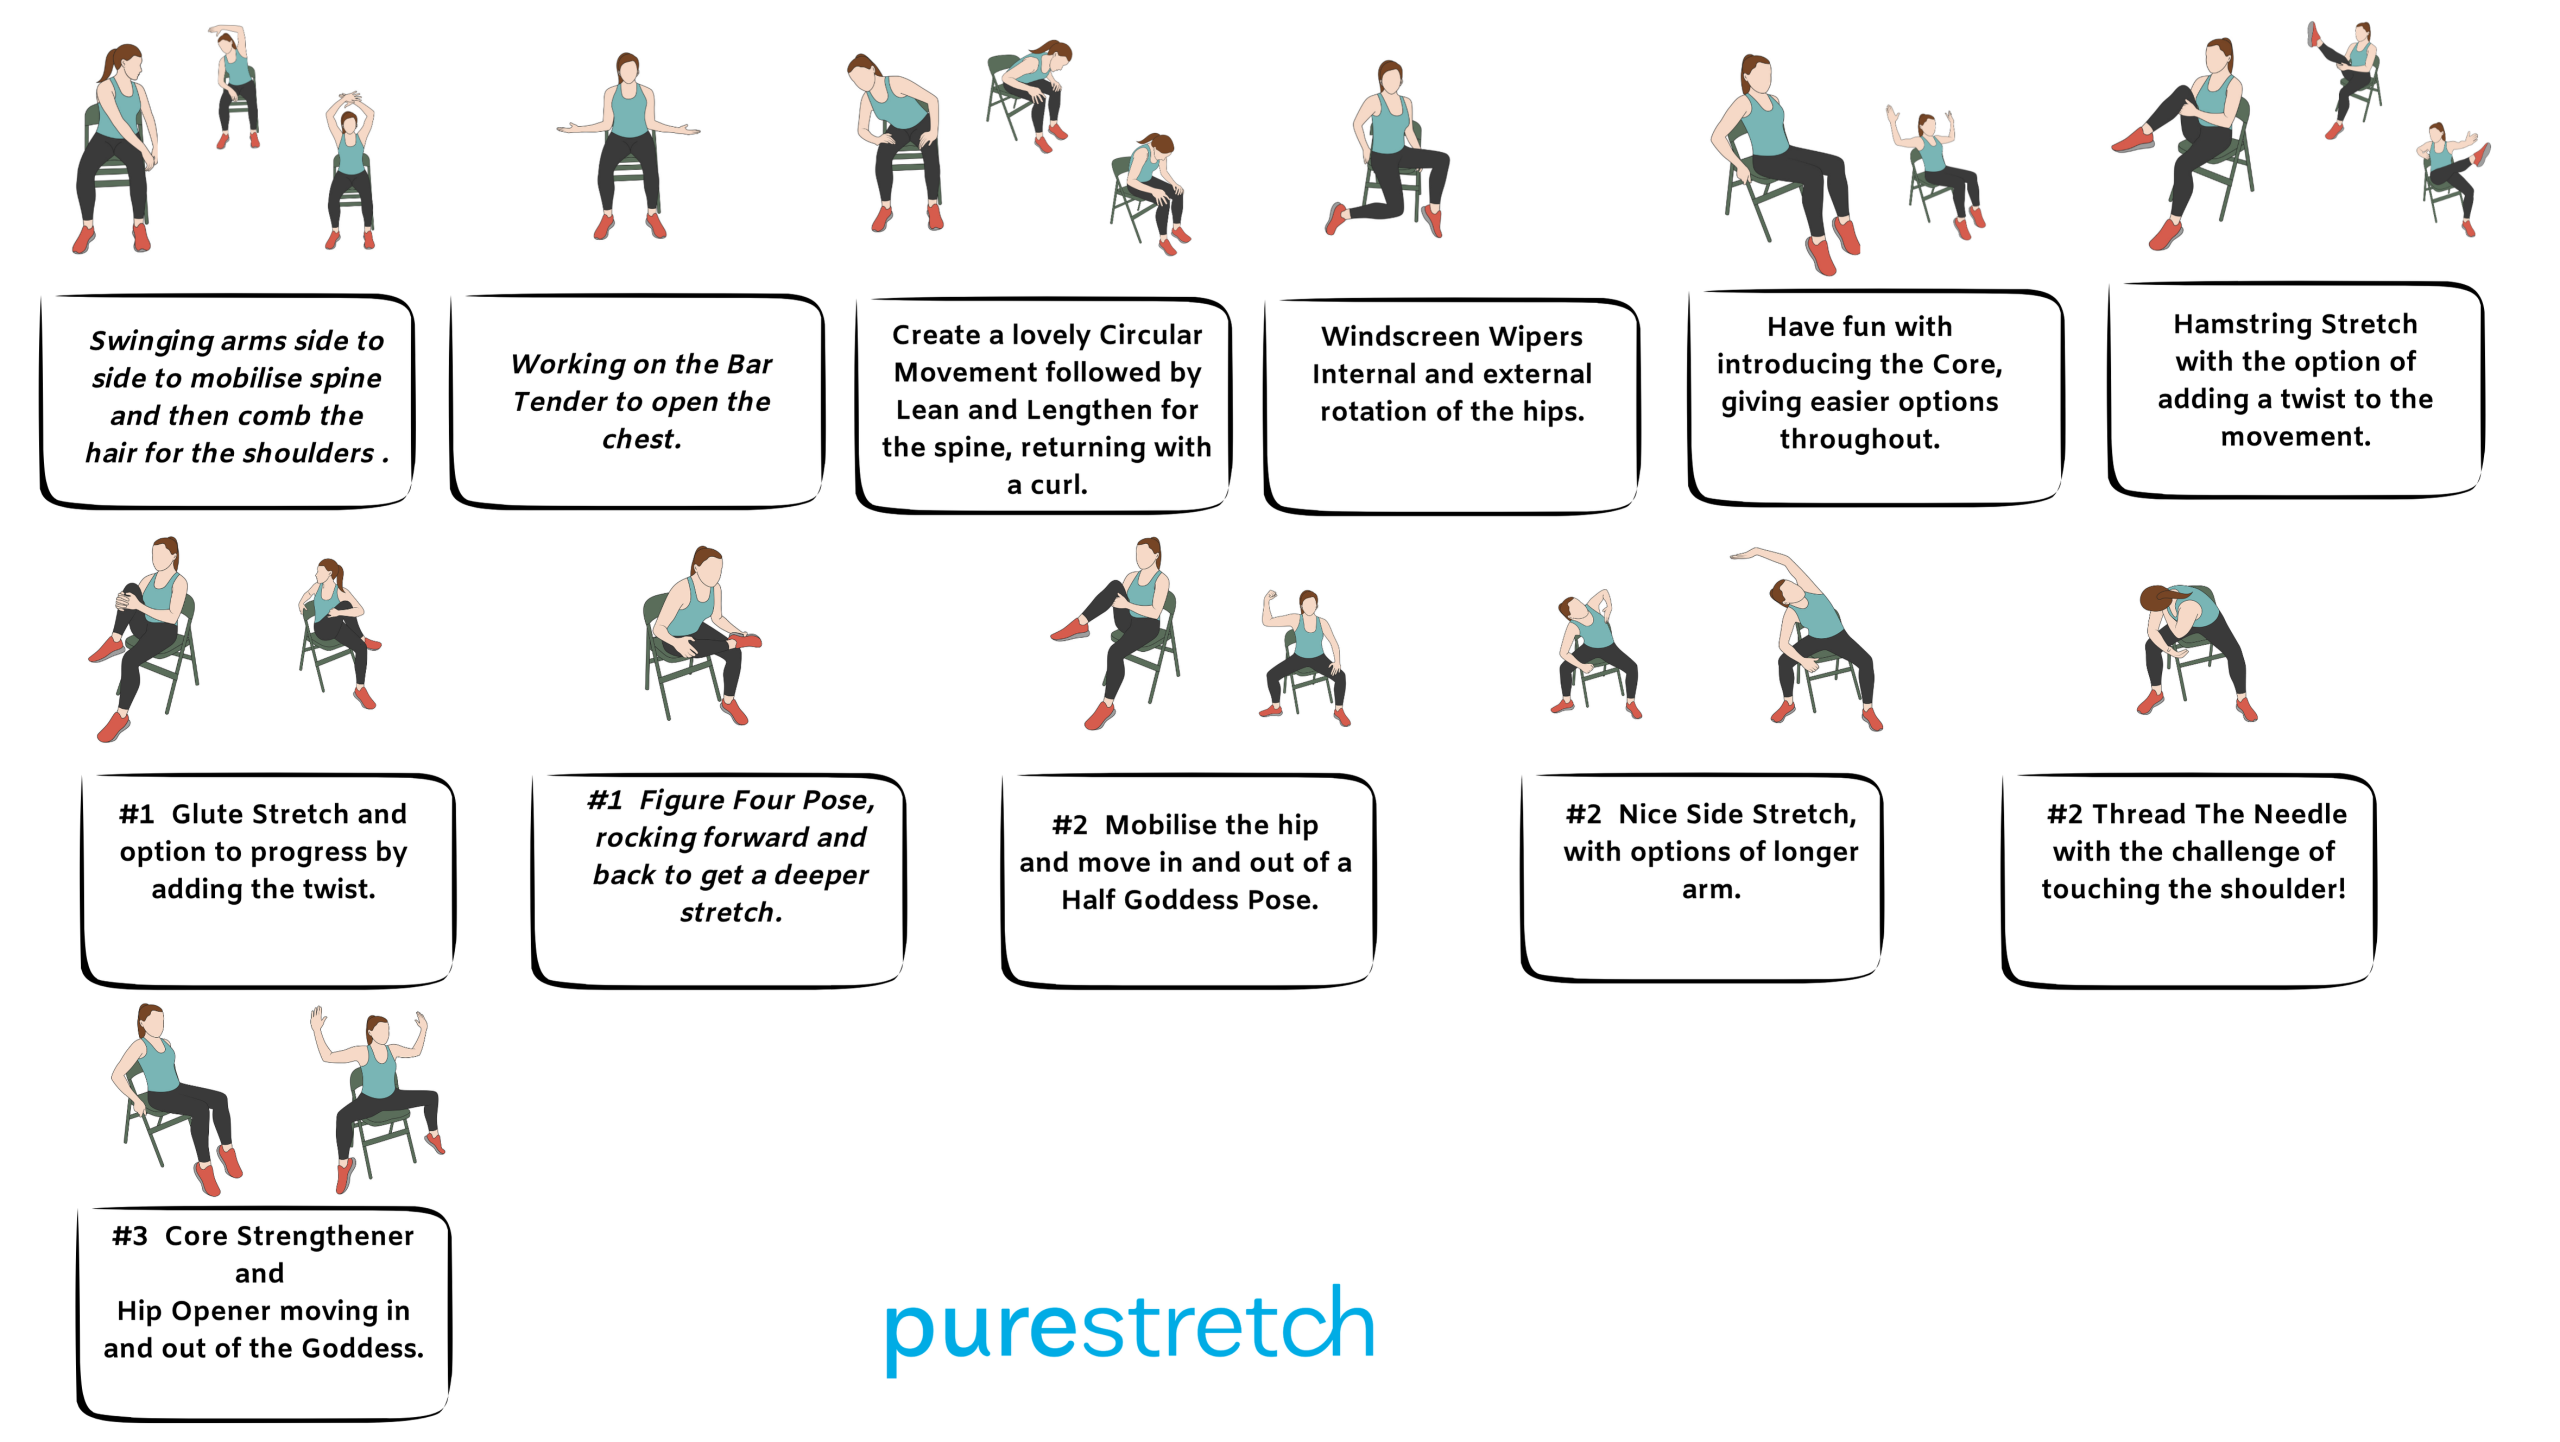
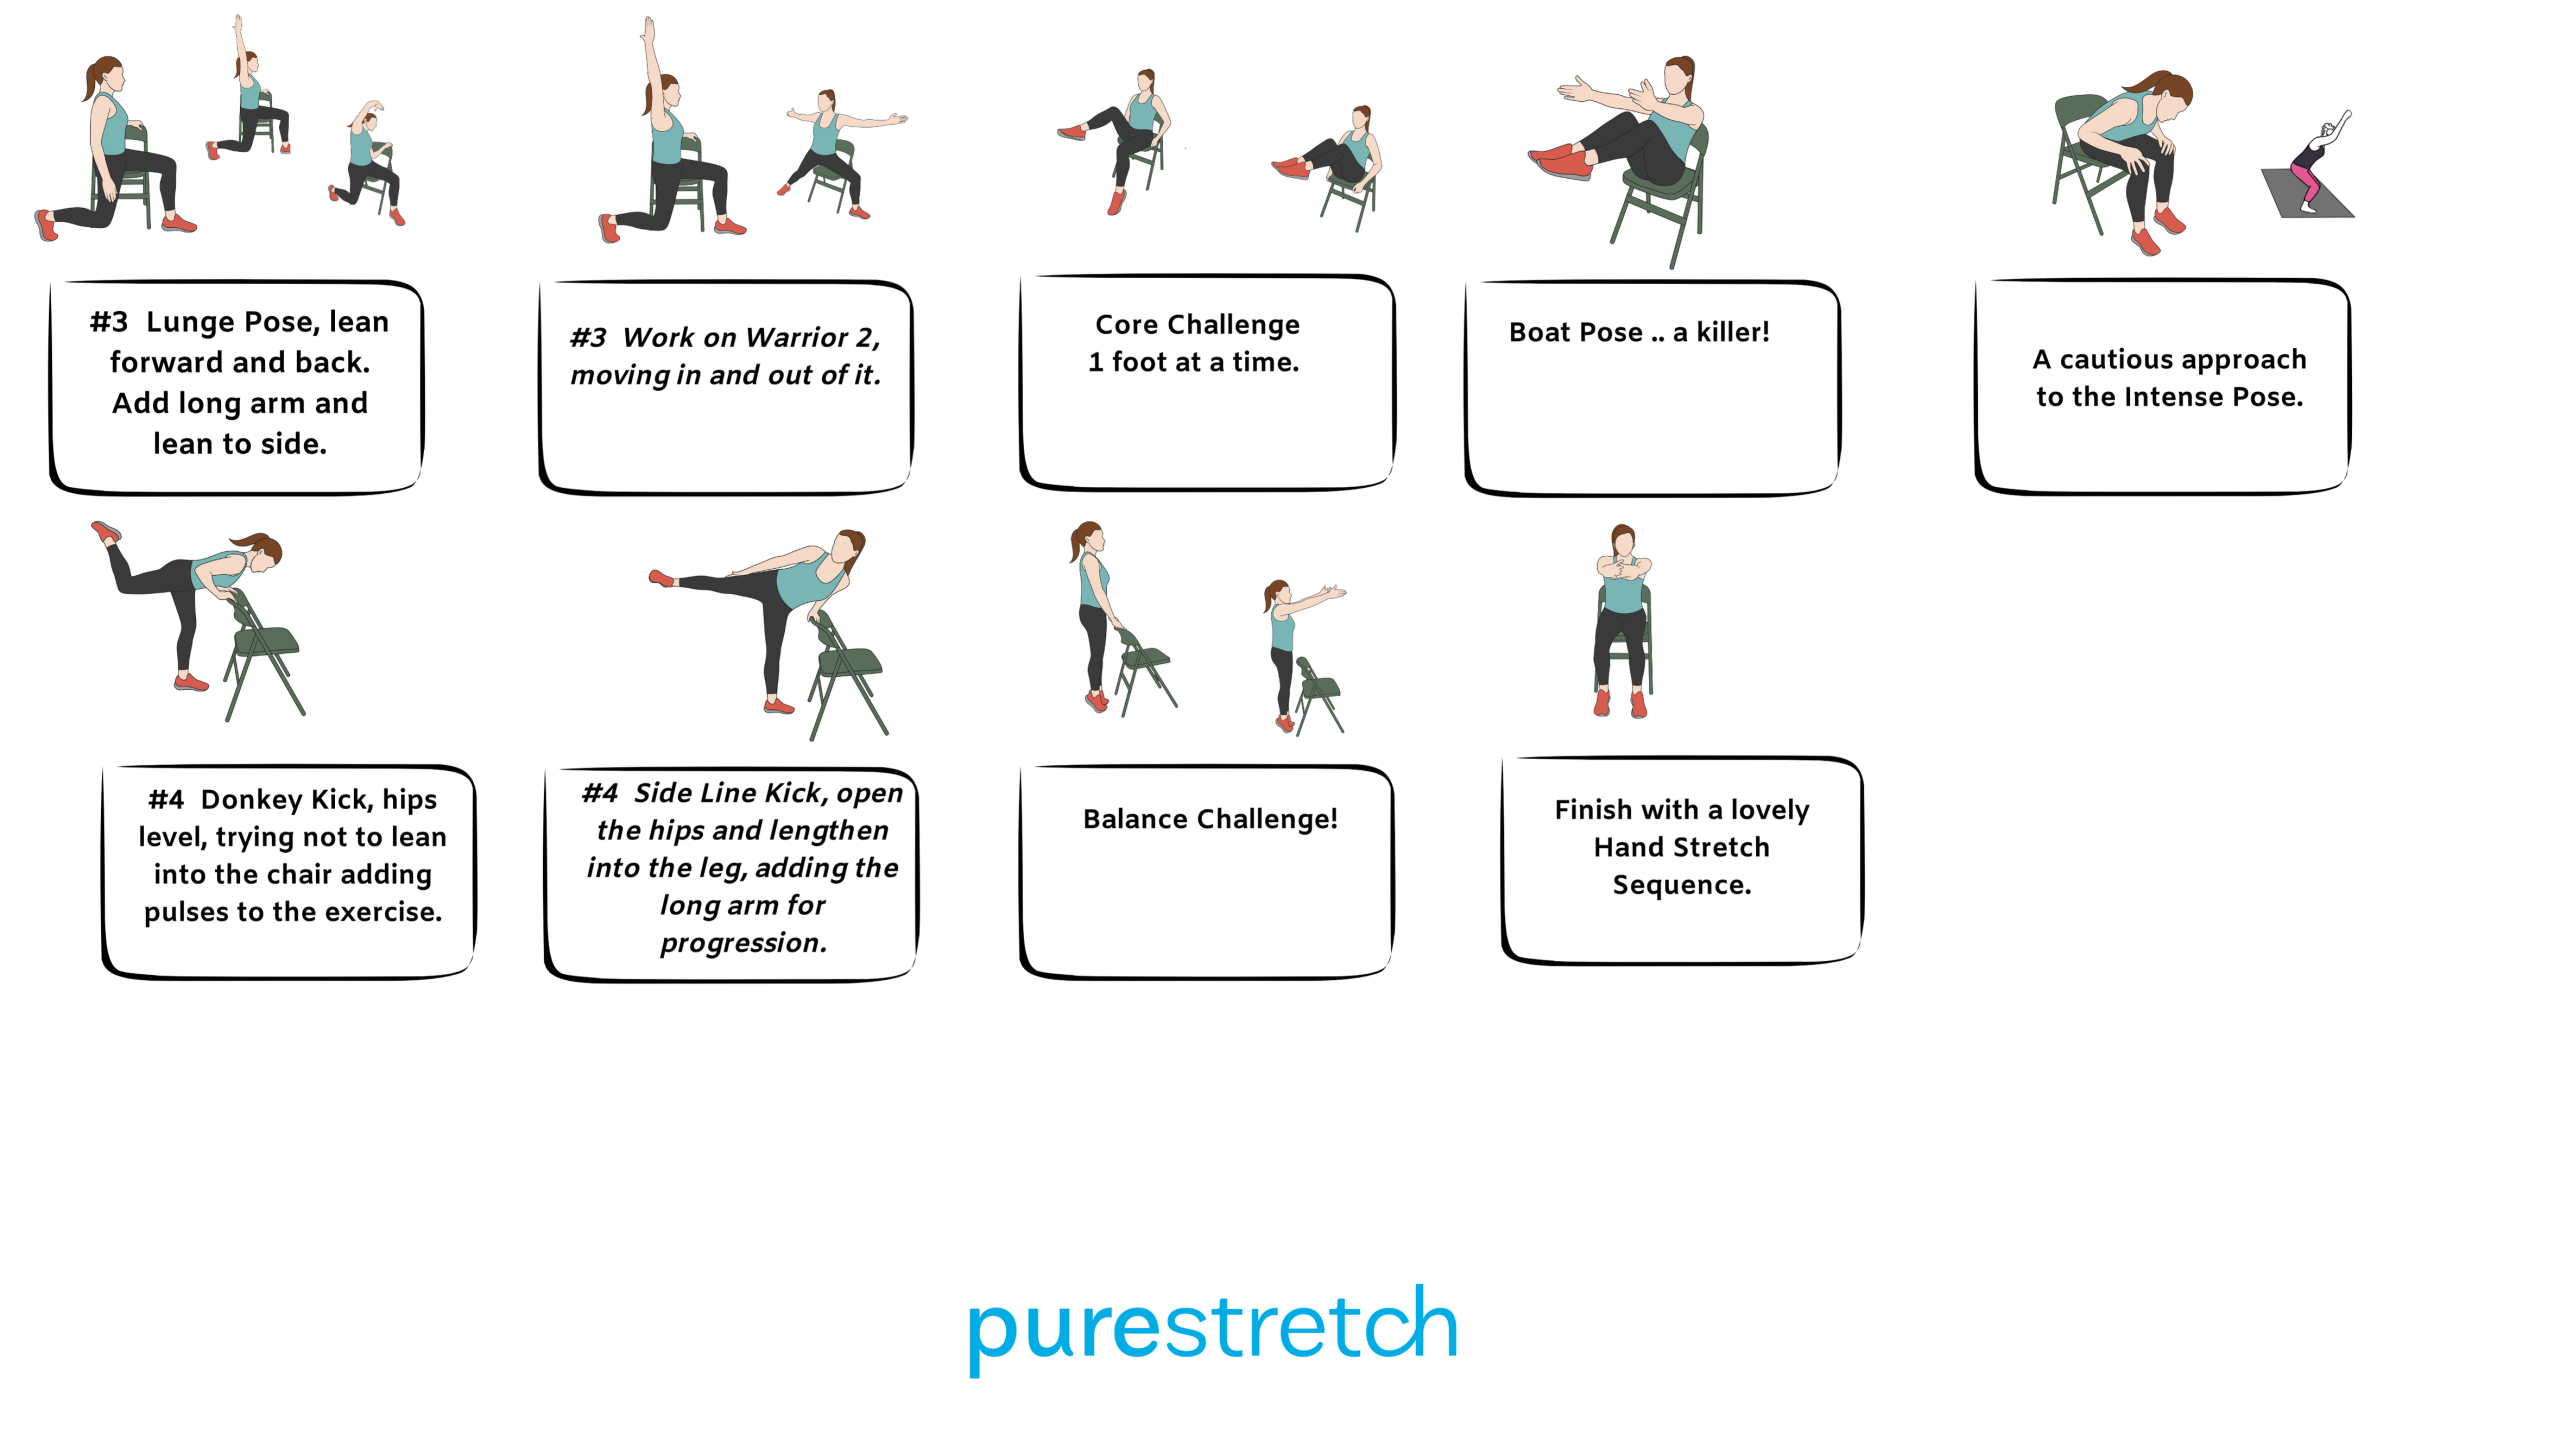
Chair Fit 1 Routine
Class Description: Our first Chair Fit class, a gentle, low-impact workout making it ideal for individuals with limited mobility. The class enhances balance, flexibility, and muscle strength through seated exercises, incorporating gentle stretch movements. The exercises can be adapted to various fitness levels and also includes core work.